Même si la voiture présente bien, de loin et au soleil, de près c'est nettement moins sympa.
Faisons un petit tour de l'extérieur:
Baie de pare-brise / Capot:
De la rouille perforante masquée par une épaisse couche de mastic entre le volet d'aération et la charnière du capot:

Idem sur le bas de la baie de pare-brise:

=> A changer !
Longerons / Bas de caisse:
L'avant du longeron droit. Il parait bien atteint, et pourtant il semble sauvable. L'avenir le dira.

Par contre, le gauche est mort de chez mort: l'écrou de fixation de l'aile ne tient plus, corrosion perforante dessous sur toute la longueur, et le renfort destiné à recevoir le cric est même passé au travers... => A changer !


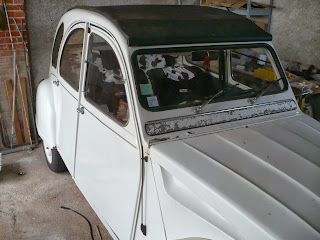
Custodes:

A gauche, par contre, pas de rouille apparente, mais la tôle est complètement bouffée... Ça va être sympa à refaire.
Face arrière:
La face arrière: une grosse épaisseur de mastic cache-misère. Après avoir fait sauté quelques morceaux, la tôle supportant les feux et la plaque est nase, mais le reste parait OK.

Pour le reste:
- les ouvrants sont en bon état (portières, porte de coffre et capot),
- les planchers avants sont trèèès fatigués (photos à venir),
- le plancher de pédales est à changer,
- sur les 4 ailes, seule l'avant droite est réutilisable.
- les pare-chocs sont bons pour la ferraille,
- l'intérieur est globalement en bon état (sera détaillé par la suite),
- le moteur et la boite tournent bien, et ne semblent pas avoir de problèmes,
Pour résumé, une vaillante petite voiture dans un état "classique" pour ses 33 ans sans vraie restauration.
... On va remédier à ça ! \(^o^)/
Faisons un petit tour de l'extérieur:
Baie de pare-brise / Capot:
De la rouille perforante masquée par une épaisse couche de mastic entre le volet d'aération et la charnière du capot:

Idem sur le bas de la baie de pare-brise:

=> A changer !
Longerons / Bas de caisse:
L'avant du longeron droit. Il parait bien atteint, et pourtant il semble sauvable. L'avenir le dira.

Par contre, le gauche est mort de chez mort: l'écrou de fixation de l'aile ne tient plus, corrosion perforante dessous sur toute la longueur, et le renfort destiné à recevoir le cric est même passé au travers... => A changer !


Custodes:
Traces de rouilles à droite. Rien de méchant au final après dépose de la vitre.

A gauche, par contre, pas de rouille apparente, mais la tôle est complètement bouffée... Ça va être sympa à refaire.
Face arrière:
La face arrière: une grosse épaisseur de mastic cache-misère. Après avoir fait sauté quelques morceaux, la tôle supportant les feux et la plaque est nase, mais le reste parait OK.

Pour le reste:
- les ouvrants sont en bon état (portières, porte de coffre et capot),
- les planchers avants sont trèèès fatigués (photos à venir),
- le plancher de pédales est à changer,
- sur les 4 ailes, seule l'avant droite est réutilisable.
- les pare-chocs sont bons pour la ferraille,
- l'intérieur est globalement en bon état (sera détaillé par la suite),
- le moteur et la boite tournent bien, et ne semblent pas avoir de problèmes,
Pour résumé, une vaillante petite voiture dans un état "classique" pour ses 33 ans sans vraie restauration.
... On va remédier à ça ! \(^o^)/
Comments
Post a Comment